If you want to show a screenshot on your own website that automatically gets updated when a fresh screenshot is captured, here are the steps to achieve it.
⚠️ This guide is based on Make (formerly Integromat) and Digital Ocean Spaces , but the concept should work on other automation tools and storage providers (e.g. AWS S3) as well. To get started, you'll need an account with both mentioned services . Sign up for these accounts and follow the guide below. The guide also contains some technical concepts, which may require you to rope in a developer to assist.
You are free to create your own solutions with our webhooks and API. The proposed setup below is just to help you get started very 'Space-friendly', as it is set up in a way that the new screenshot file will always overwrite the previous one. So you won't end up with a huge bucket of files, as only the latest is stored.
Step 1: Create a scenario and add webhooks
Click on the " Create a new Scenario" button, which should take you to a page where you can search for "Webhooks". Select it and click on "Continue".
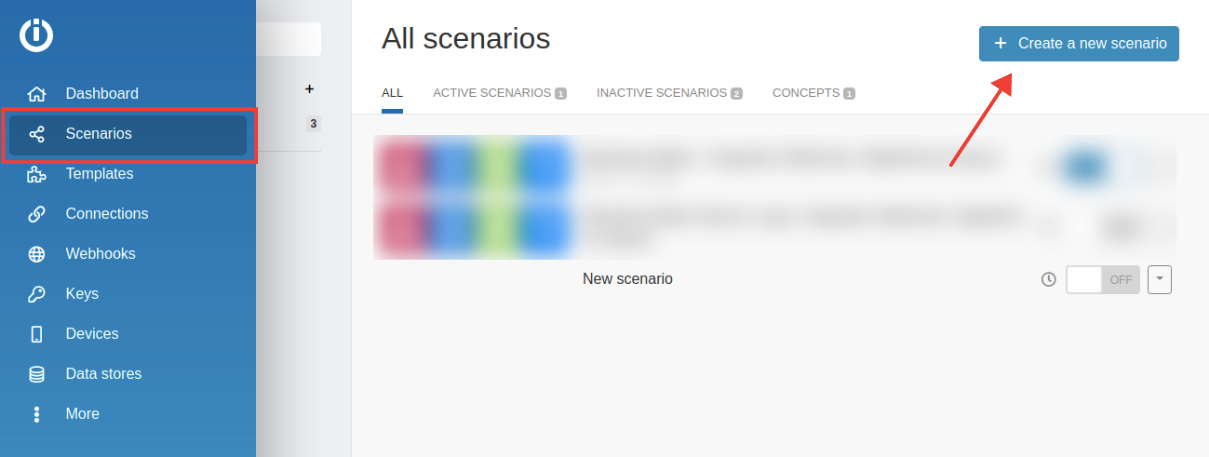 You will end up with a page similar to this:
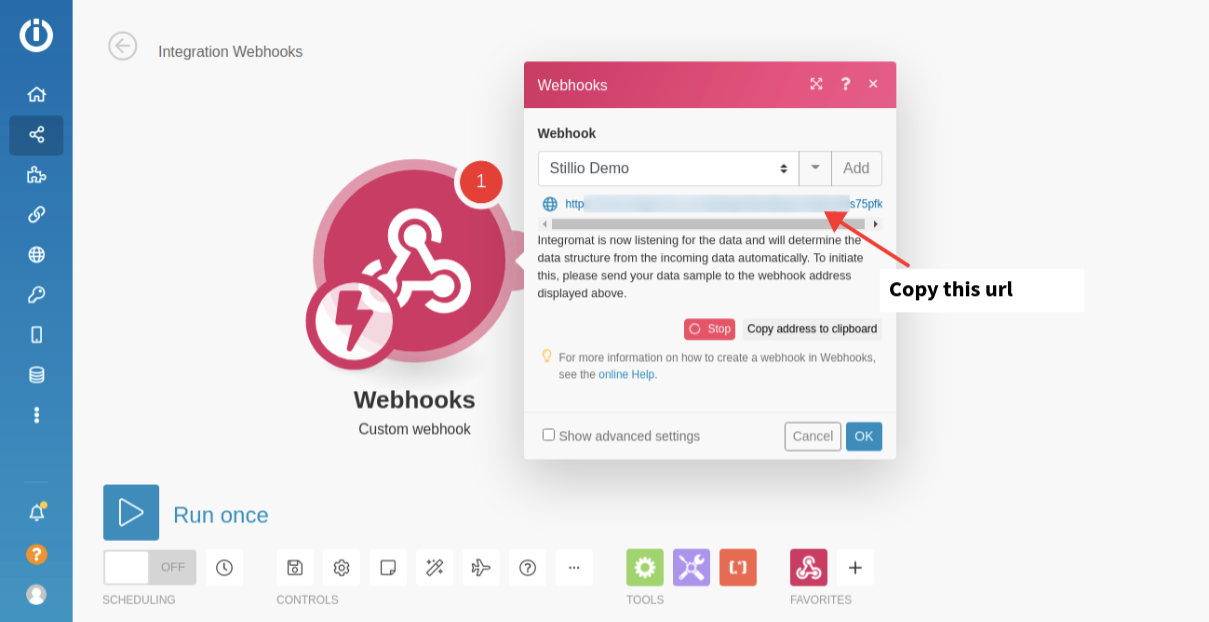
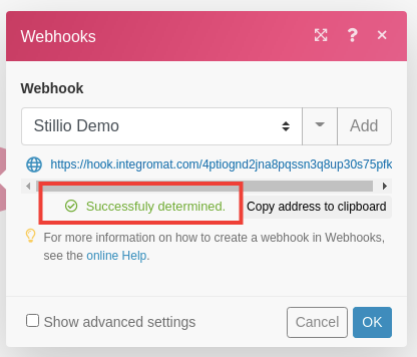
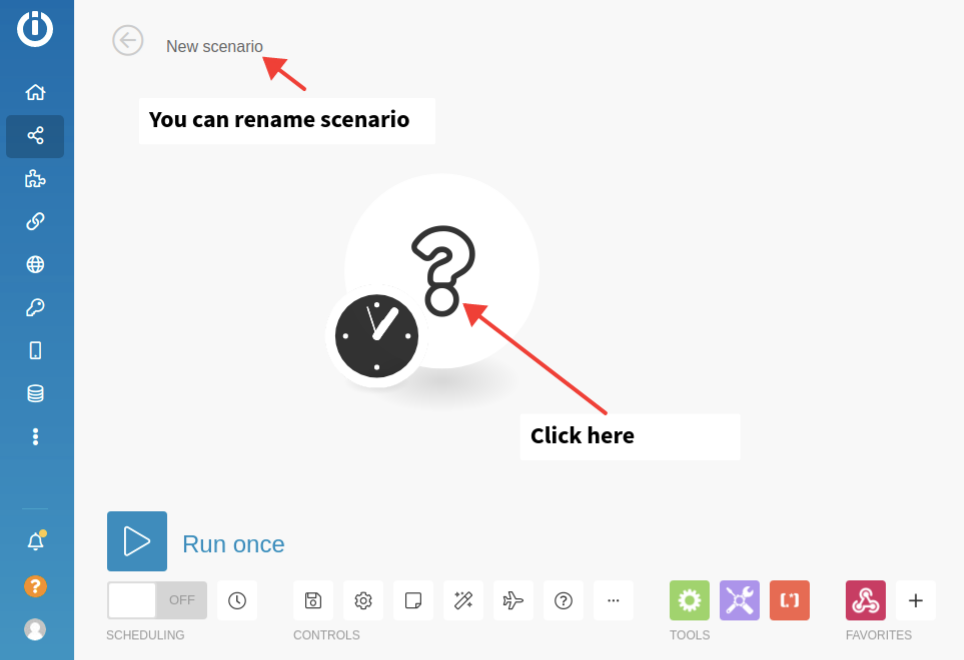 Click on the "?" symbol > "Webhook" > "Custom webhook". Give your webhook a name (of your choice), after which you will click the "Save" button, and that will generate your unique webhook URL - to be pasted in your Stillio account settings here: https://app.stillio.com/settings/apps like so:
 Paste below:
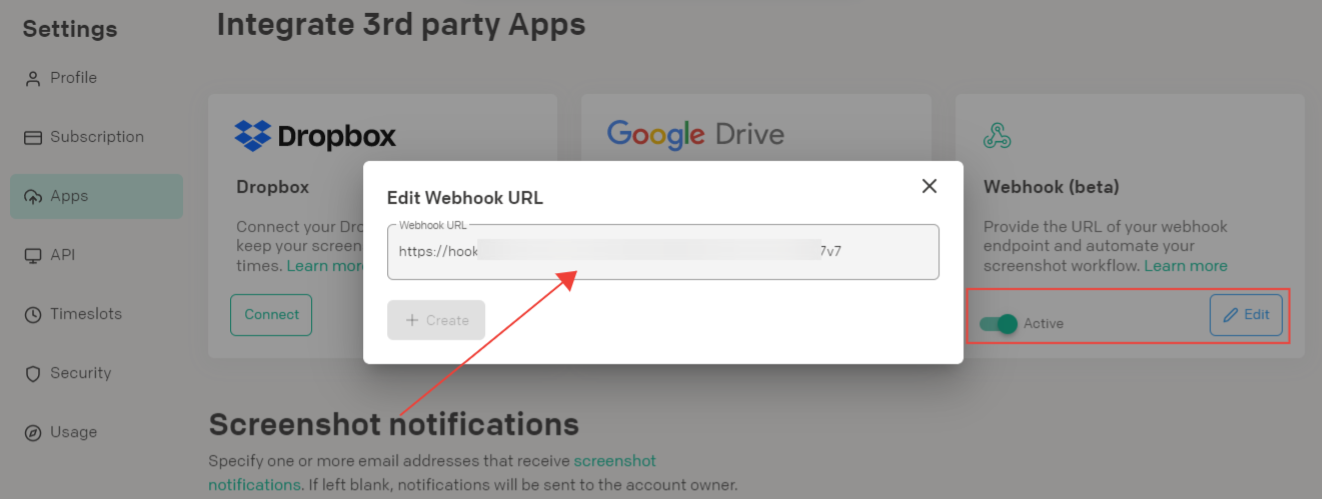
After pasting the copied webhook URL from Make and pasting it into your Stillio account, and saving it, you will need to create a new screenshot so that Make will know what data structure to expect while the process runs. Create a new screenshot and head back to Make once more. Wait for some time and then you'll end up with a screen like the one below. This means that Make has received the data of the last capture and now knows what to expect whenever a new screenshot is captured. We can now start manipulating the data as desired.
 Step 2: Add HTTP Module
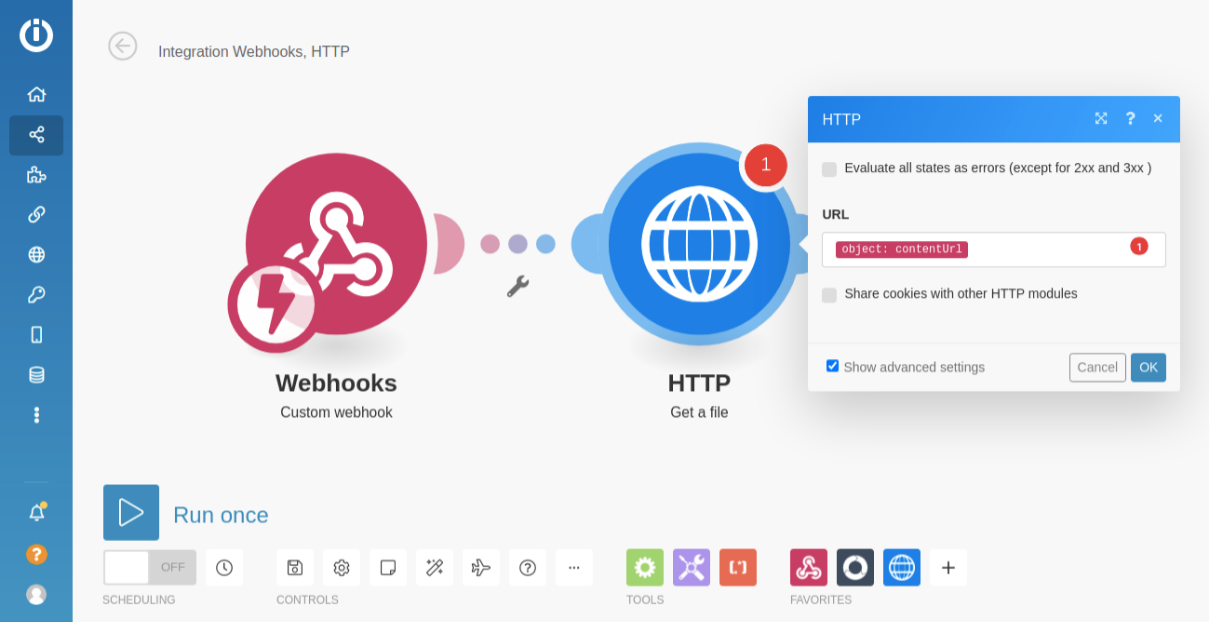
To be able to download the image from your Stillio account to Make, you need to add the HTTP module - to make a request for that image file. After adding the " HTTP" module and clicking the "Get a file" action, it will show a screen similar to the one below. Click the input field labeled "URL" and select "object > contentUrl" and then click on "Okay".
Step 3: Add Digital Ocean Spaces
To use this module, you first need to create a " Space" on your Digital Ocean account. For a step-by-step guide, follow this article: Create Digital Ocean Space. After that, you can head over to Make and continue the setup. Select the HTTP module and add another module - this time, "DigitalOcean Spaces".
Provide your details like in the image below:
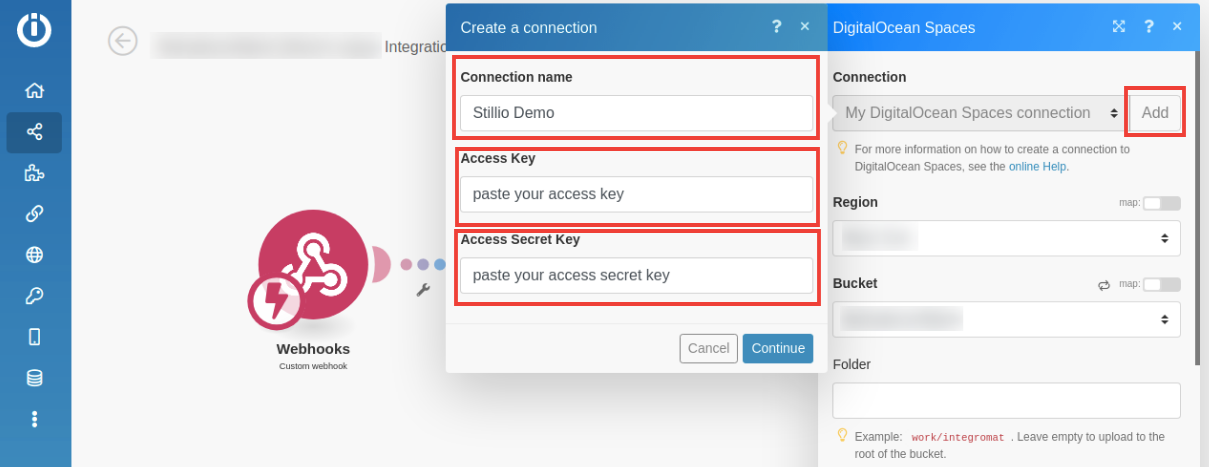
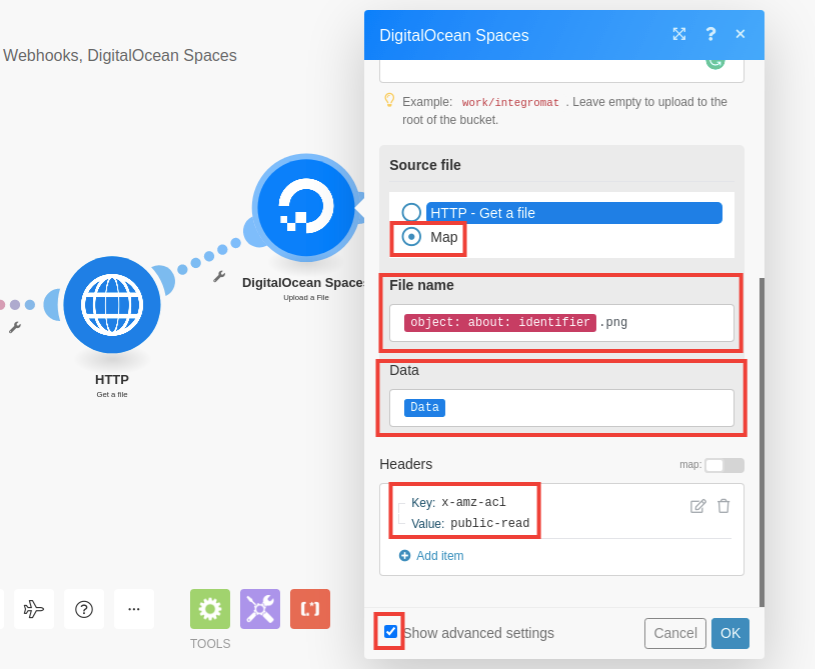
After that, where it shows " Source file", select "Map". Clicking on the "File name" input field gives you a plethora of options, from which you will select "object > about > identifier". Append the text ".png" to it. The "Data" field can be left as is - "Data".
Toggle on the " Show advanced settings". Under "Headers", add a new item with the following key/value pair: key=x-amz-acl and value=public-read. This is so that when files get uploaded to your Digital Ocean Space, they will become public, hence be accessible from your HTML page.
Step 4: Add an Error handler
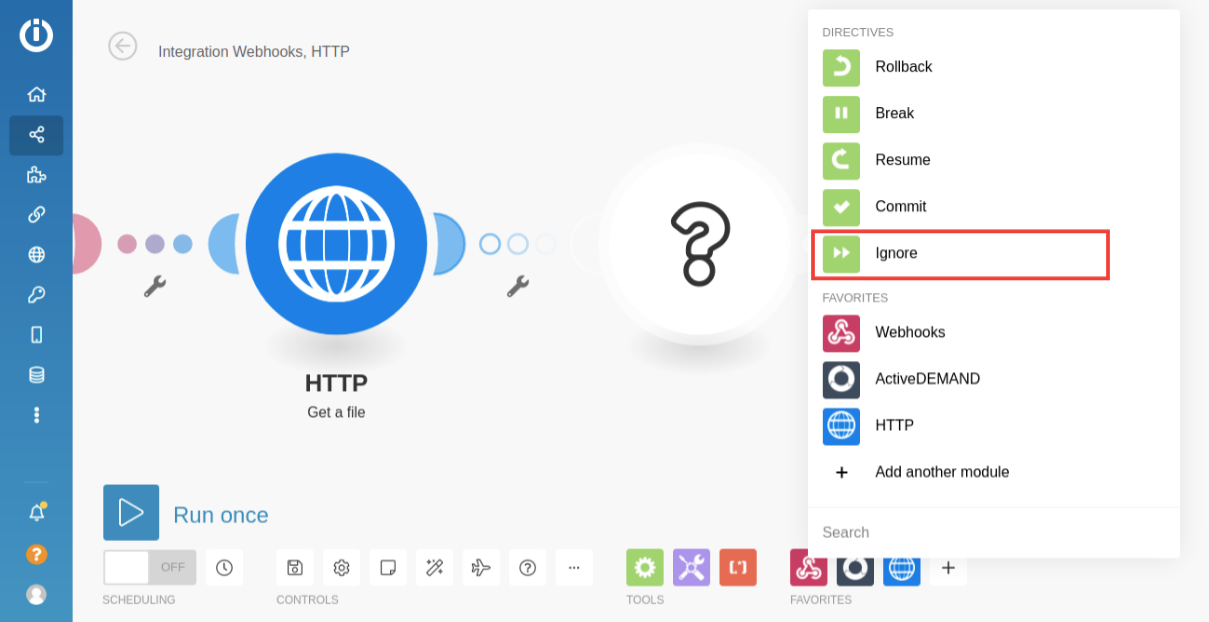
We need to tell Make to continue running the process even if an error occurs, this way, errors will not crash the entire process. To do that, right-click on the HTTP module and then click the " Add error handler" option. Select "Ignore" from the list of directives. Now the error handler is properly set up and the process should not crash even if an error occurs.
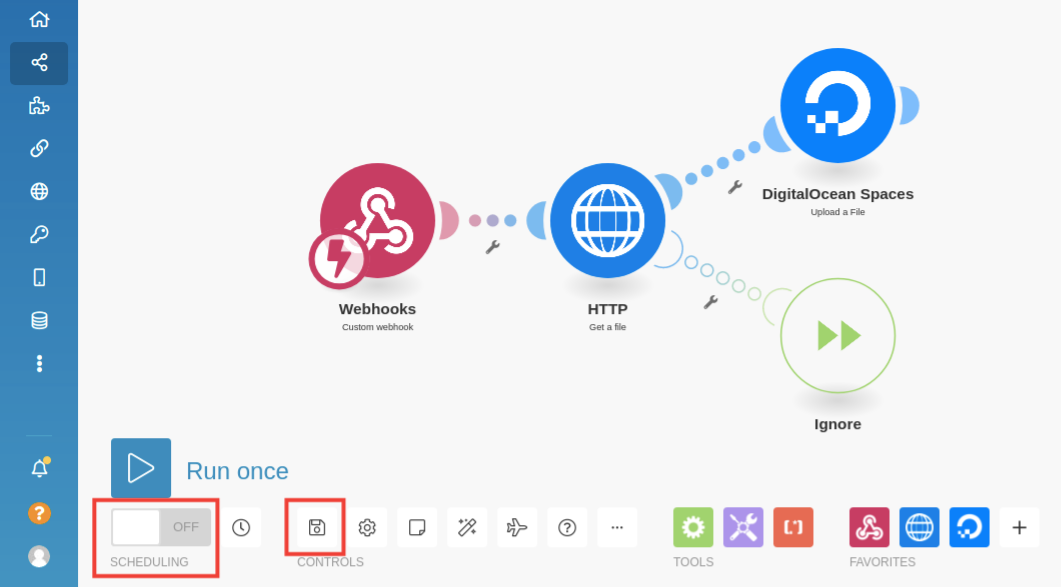
 By now, you should have a setup similar to the one below. Save the scenario and turn it on. You can also run it once to see how it works first before enabling it.
Step 5: Embedding the script into your HTML page
Javascript:
Paste the following snippet of JS code at the bottom of your HTML page (right before the </body> tag). You can also inject the piece of Javascript code into any platform that allows Javascript code injection. Copy the code from below and paste it into the relevant file:
HTML:
To embed the screenshot into any HTML page, just add the following line of code
<div data-stillio="https://{your-bucket}/{url-id}.png"></div>
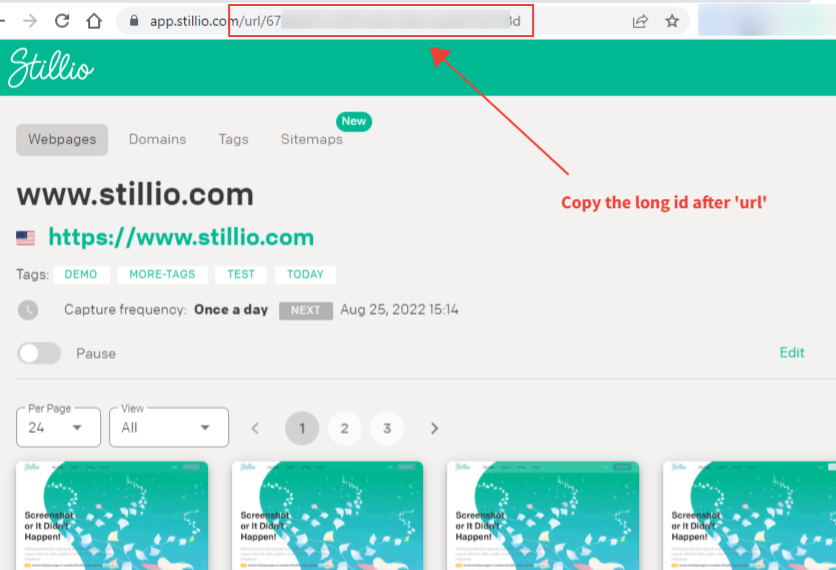
You can obtain the url-id from your Stillio account like so:
🎉 Congratulations! Now whenever you refresh your HTML page, you are always going to get an up-to-date version of the screenshot for the specified URL.