Our Sync to Webhook option is perfect to automate workflows on Make.com for your newly captured screenshots. With the Webhooks option in Make, you have tons of options on what needs to be done when a new Stillio screenshot is created.
Prerequisites
A Make.com account needs to be created upfront.
Though you can get some basic functionalities with a free Make account, our examples are based on a paid Make subscription as this offers premium apps and multi-step action which lets you benefit most.
Which Make subscription plan is best for you depends mostly on the number of scenarios you want to create and how many tasks you need to run. For example, syncing a screenshot costs at least 1 task per screenshot, or more if you have defined multiple Make tasks per screenshot.
Create a Scenario
Once you have created your Make account, you can create a scenario to define which task(s) need to be performed when a screenshot is created in your Stillio account.
1. Choose a Trigger App
To set up this first step, use the search box to find the "Webhooks" app. Select the "Custom webhook" option as shown below.
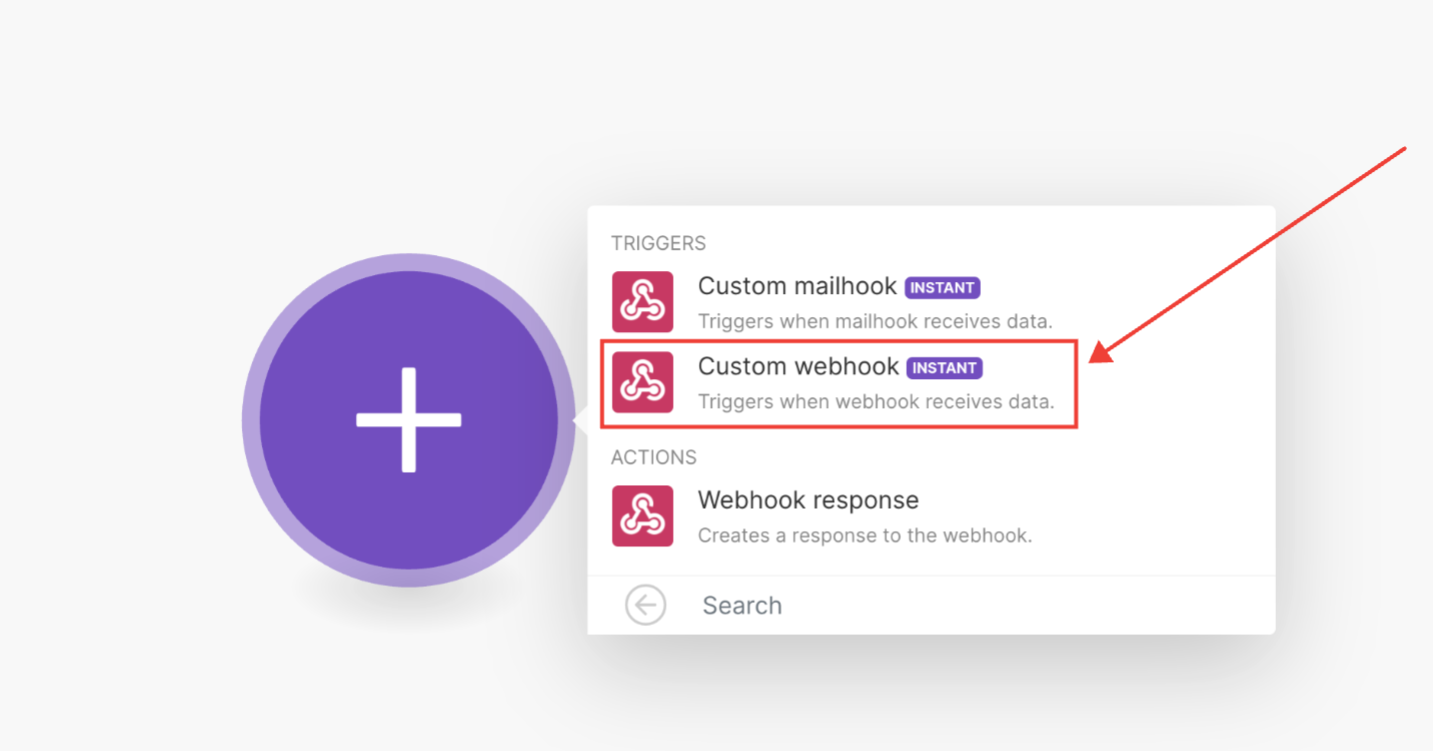 In the pop-up box, click "Add" to create a custom webhook name.
2. Add Make webhook to your Stillio account
In this step, Make generated a custom and unique webhook URL for you to send requests to, like the example below:
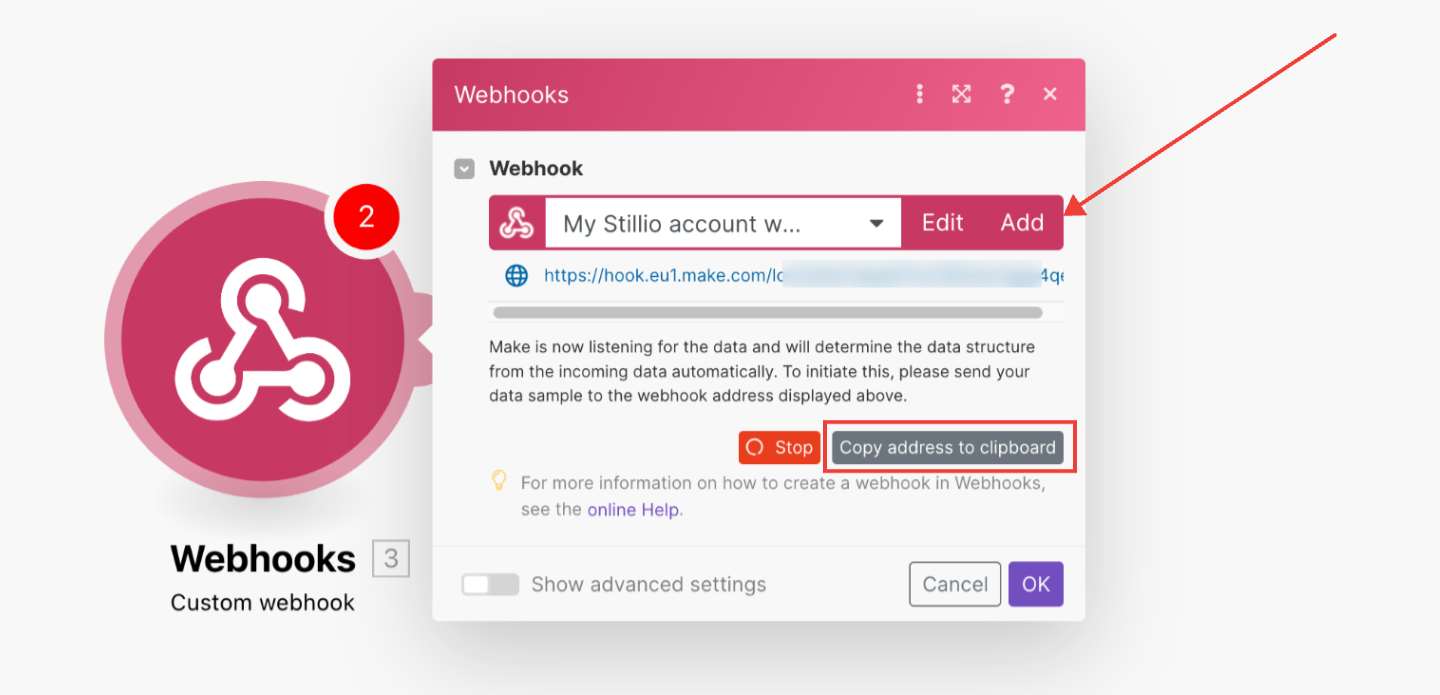
Copy the webhook URL.
Add Make Webhook URL to Stillio Apps
The webhook URL from the previous step needs to be added to your Stillio account. Go to the Apps section in your account: https://app.stillio.com/settings/apps.
Click the "Edit" button for the Webhook option. A popup is shown where you can paste the Make webhook URL from the previous step.
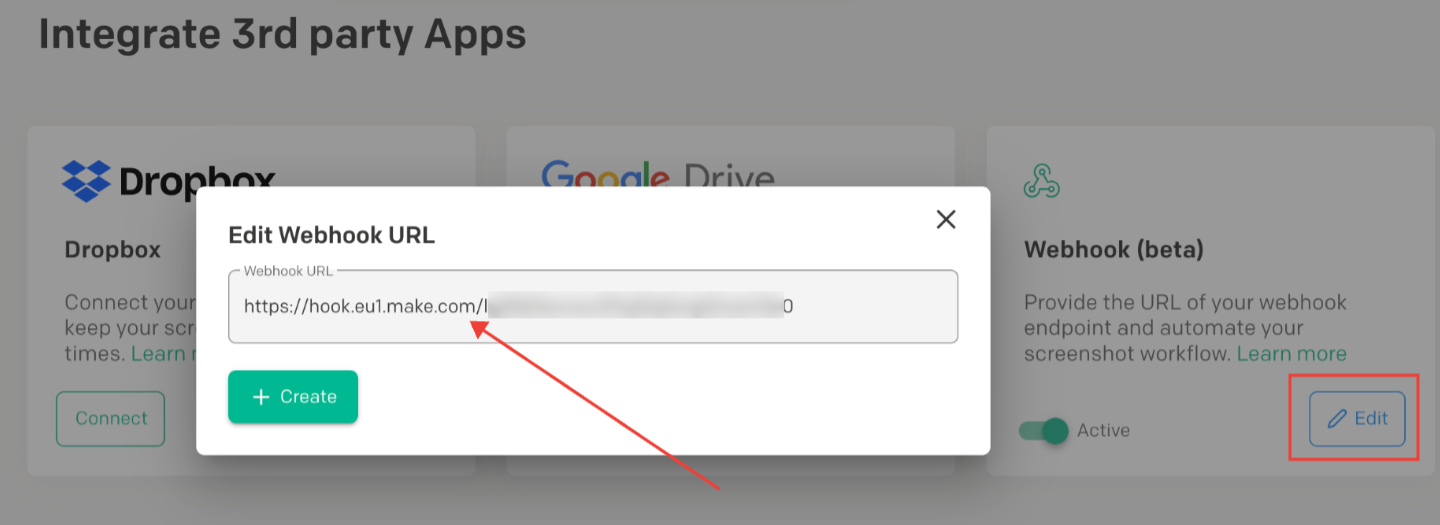
After you click "Create" you can activate the Webhook to be used for all web pages in your account.
3. Create a sample screenshot
Before you can continue in Make, you need to create a screenshot in your Stillio account. This will trigger sample data to be sent to Make which you need to define actions.
To create a screenshot right away you have 2 options:
- Add a web page to your Stillio account and set Starting to "Now" and click "Add webpage"
- Edit an existing web page in your account and set Starting to "Now" and click "Save Changes"
Most times, a screenshot will be created within a minute. Go back to your Make account to continue the Trigger setup.
Make received the "payload" for the sample screenshot you just created in your Stillio account:
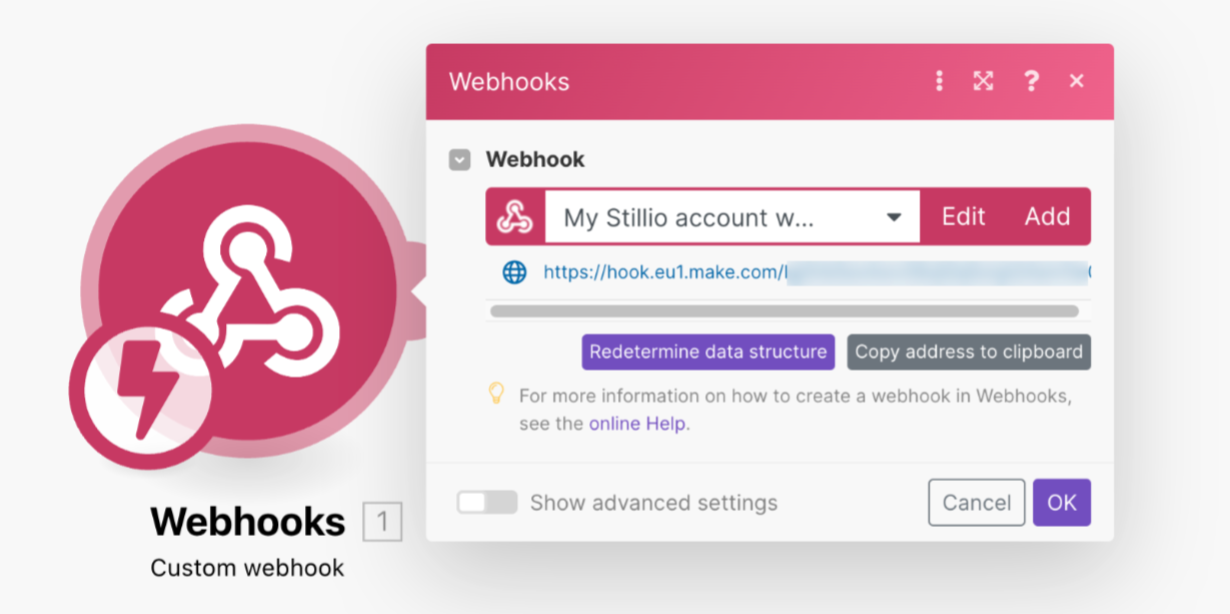
To verify that the payload has been sent successfully, add the module "Tools"
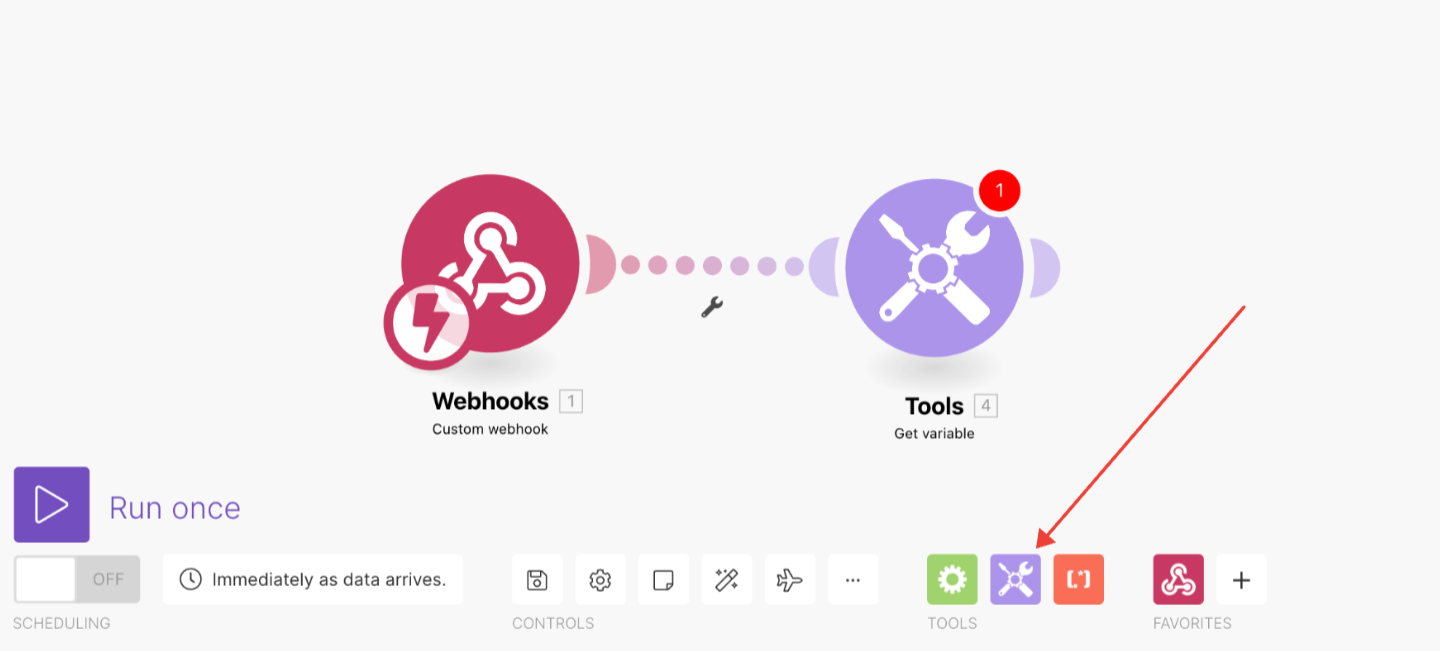 Select "Get variable" and you'll see the payload content like so:
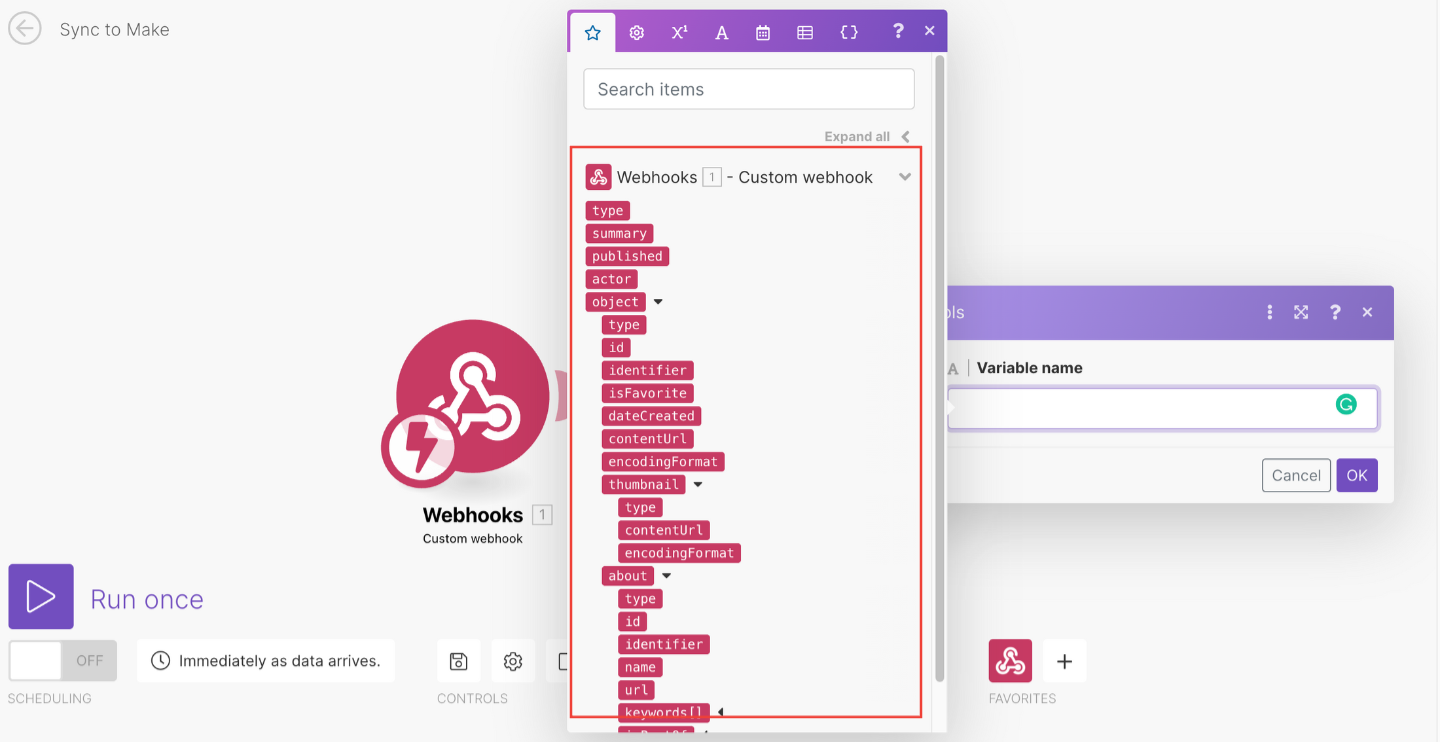
To learn more about the formatting and labels of the data, check the Stillio webhook API docs.
Click "OK" and continue. Your Make trigger is now ready to connect to an action. In other words: What do you want Make to automate for you? Make offers hundreds of apps you can choose from.