Stillio lets you sync all screenshots to an Amazon S3 Bucket by using Zapier.
⚠️ To start, follow all steps in the Sync to Zapier doc first. Once you have set up your webhook trigger, you can continue to create an action in Zapier.
Requirements
Add Action
Search and select the "S3" app. In the next step, you need to Select an Amazon S3 Action.

Select "Upload File" and Save + Continue.
Select Amazon S3 account
In the next step, you need to connect your S3 Account and grant access to Zapier to use it.
⚠️ An Aws Access Key ID and Aws Secret Access Key are required. Setting up your AWS S3 Bucket and granting the appropriate rights to an Access Key ID and Secret Access Key are beyond the scope of this document. Contact your system administrator or an AWS specialist to do this properly and securely.
Set File Upload Template
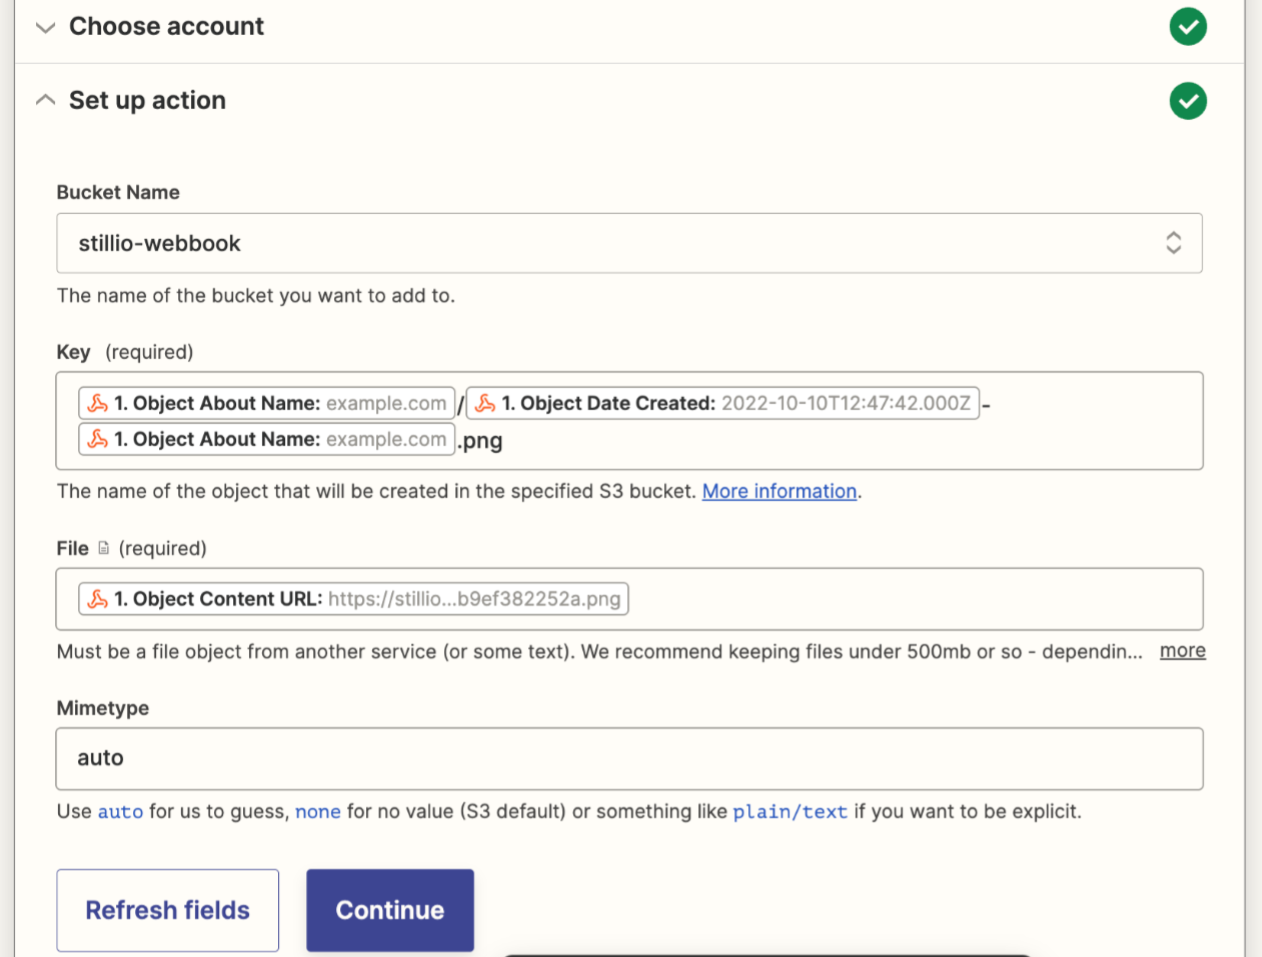
Now your Trigger is set and your S3 account is added, you tell Zapier what to do when a new screenshot is created:

Required parameters to save a file:
- Bucket name
- Key
- File
The Bucket Name field is the name of the bucket stored on S3. Zapier will automatically populate the list of the buckets found on your S3 account so that you can choose the desired one.
The Key field is the destination of the file on S3 and it comprises the filename and/or subfolder of the file. We want to save the file such that:
- Folder: we want every screenshot to be saved in a folder such that the name of the folder corresponds to the domain name of the screenshot that was captured. From the webhook payload, we can get the domain name by accessing object > about > name.
- Filename: For the filename, we want to save it using the format "timestamp-domain.png". The resultant filename will be similar to "2022-10-03T10:34:49:000Z-example.com.png". Since we are using a timestamp as part of the filename, this will ensure that we obtain unique filenames.
The File field is the original location where your screenshot is stored within the Stillio cloud. This is typically a URL of a hosted image. S3 will request that file based on the given URL and then download it to further process.
You can customize the folder and file names to accommodate your needs.
Click "Continue".
Send a test to Amazon S3
In the next step, you let Zapier send a test file to your S3 bucket. Click "Send test to Amazon S3".
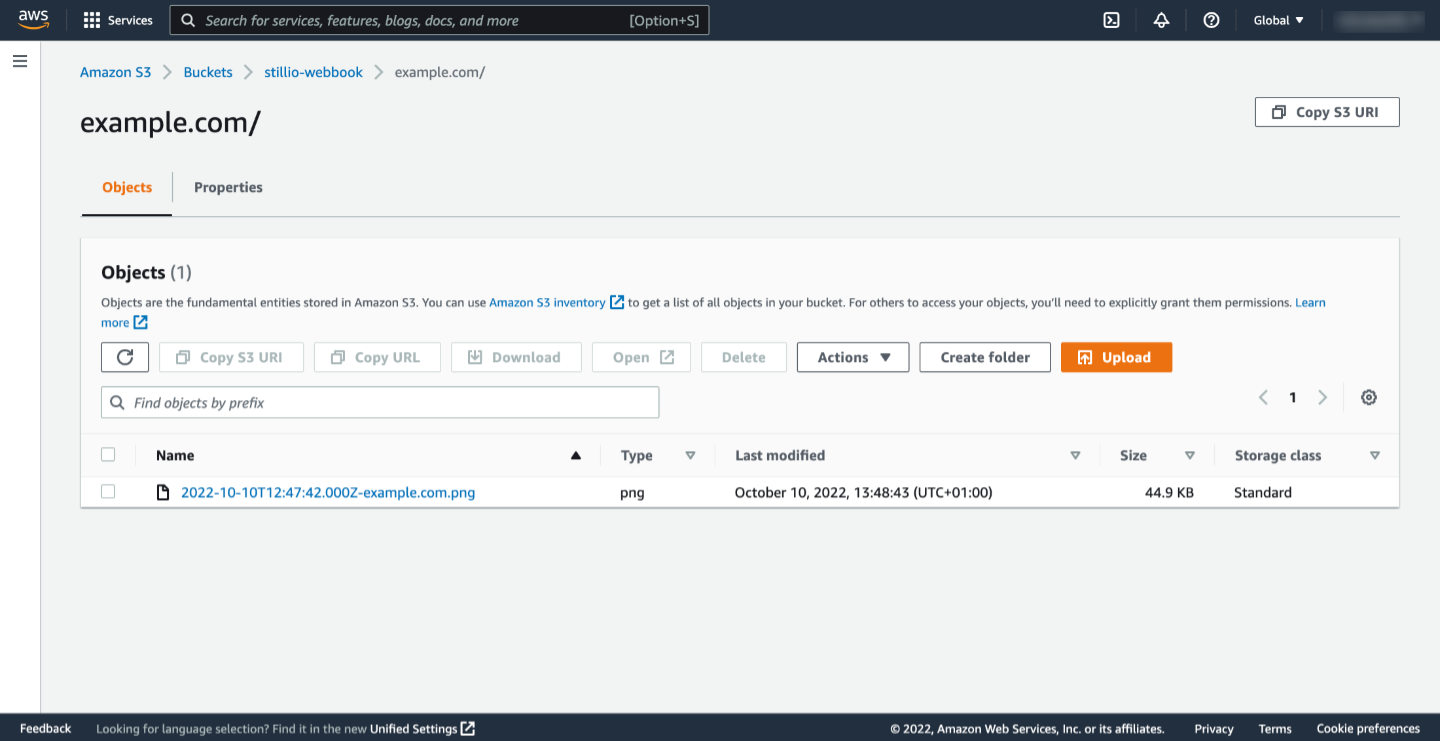
Go to your S3 Bucket and verify that the screenshot has been saved as you specified:

As you can see in the above example, a subfolder "example.com" was created for the part before the "/".
Activate Zap
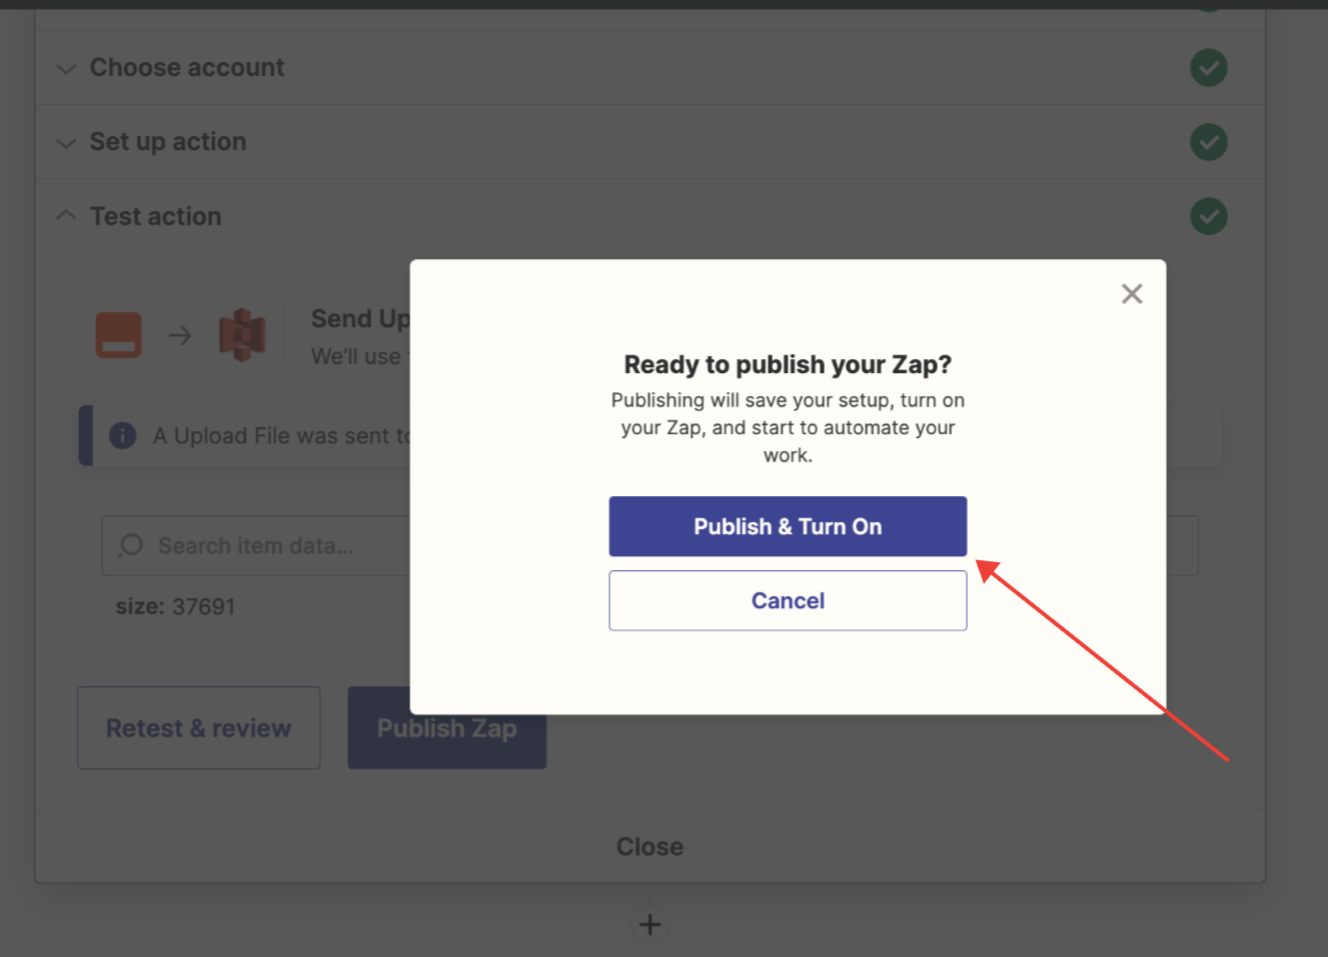
In the next step, name your Zap and turn it on:

🎉 Congratulations! Your Stillio screenshots will now be saved to your S3 Bucket.

